How To Set Up A Private Blog
Not all blogs need to be open to the public. Sometimes you may want to keep information hidden from others outside of a select group. Luckily, WordPress offers the ability to create a completely private blog. This can be used in addition to various other security features that will protect your data.
In this tutorial, we're going to show you how to create that sense of security.
Why Set a Blog to Be Private?
A private blog gives you the freedom to share information that a select group can access from anywhere in the world. Here are just a few examples of what you can do with such privacy:
- Creating a family-only blog: Great for keeping in touch with members from all over the globe.
- Creating a sustainable team environment: With privacy enabled, your team can access the blog and keep connected during various projects.
- Putting up a corporate memo board: What if you had a blog specifically for the business? Memos, updates and more could be accessible for those in your organization.
- Hosting a classroom environment: Information can easily be shared with students without worry of someone else accessing the content.
- Creating a Special Access site: Perhaps you want to give customers and clients access to a special privilege blog for information and other features.
- Keeping content hidden from scraping: Setting a blog to be private has potential to prevent content scraping, the act of someone taking your content and using it as their own.
Creating a Completely Private Blog

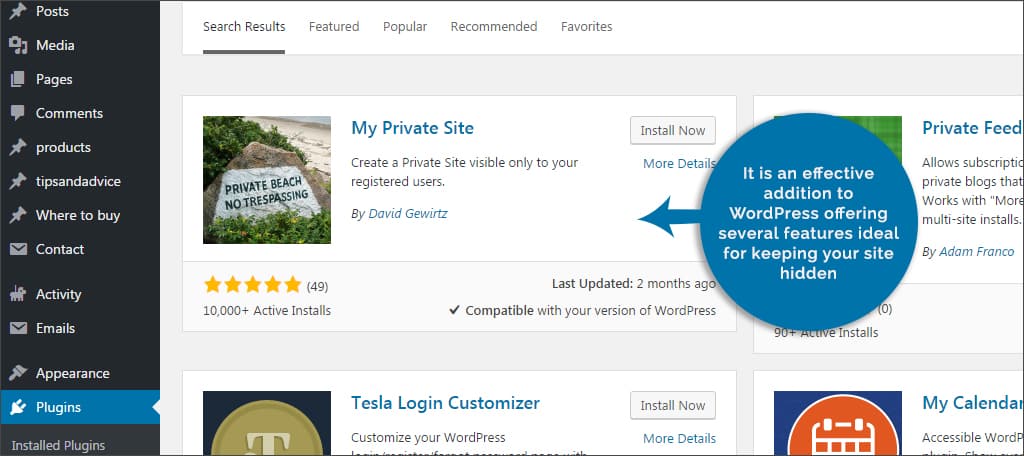
For this tutorial, we're going to use the My Private Site plugin. It is an effective addition to WordPress offering several features ideal for keeping your site hidden. To do this, go to the "Plugins" section of your WordPress dashboard. Click on the "Add New" button, search for "My Private Site," install and activate the plugin.
This will add a new function under the "Settings" area of your WordPress installation. This new feature is labeled, "Private Site." Click on this link to start setting up the privacy of your blog.
Setting Up My Private Site
My Private Site will hide your blog from search engines and visitors alike. You can also change how people access the blog including unauthorized visits. Here are the settings you will need to adjust.
Make Site Private

In the "Private Site" section of your WordPress settings, the first option you'll see is to make the site private. This is a simple box that needs to be checked before you can continue. Click this box and then click, "Save Changes."
Allow Self-Registration

The self-registration page is the same as the registration page you currently have set up for your WordPress site. The first option you can select next to the membership area is, "Anyone can register." If this box is checked, then anyone can register on your blog the same way they could before. If you're creating a site specifically for family or a secured group, you don't want to select this option.
The second option available is, "Reveal Registration Page." If you choose to let anyone register on your site, this option absolutely needs to be checked. Otherwise, you can remove it in order to hide the user registration page of your blog entirely.
Landing Location

The next setting to consider is the landing location of the visitor. When someone logs into the system, you can determine where on your blog the visitor will access. For example, you can assign the home page, the WordPress dashboard or even a specific URL. However, the URL has to belong to the site in question. This means the URL has to begin with the site's actual address such as, "https://www.your-blog.com/."
You can also set the landing page to take priority if someone accesses the "wp-login.php" area of your site. As a result, the user will be redirected to the location you selected.
Custom Login

The custom login option is only needed if you have a login screen other than the default, "wp-login.php." For instance, some security plugins will allow you to create a custom screen for logins in order to protect the site from brute force hacking attempts. The URL you create in such plugins will have to be added to this setting.
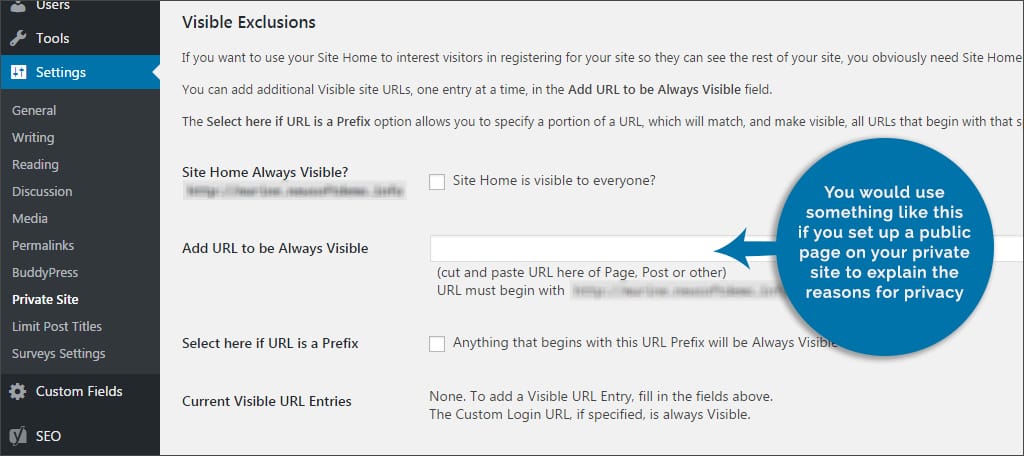
Visible Exclusions

What if you have specific pages or posts that you want visible to the general public? This is the area in which you assign that post or page. You can also make the home of your blog always visible or even set a URL prefix to always be shown as well. You would use something like this if you set up a public page on your private site to explain the reasons for privacy, offer paid access and other provided information.
Advanced Settings

In this area, you'll see a checkbox for allowing landing location for your custom login pages. This is a risky option to select for it has potential to completely lock you out of the site, even with administrative control. As a result, you would have to remove the plugin directly by accessing the root folders of your blog host and deleting the plugin folder. It's advised to leave this unchecked.
Once you have made all of your selections, click "Save Changes" at the bottom. Your blog is now set to be private-access only.
Can you make specific posts or pages private?
What if you don't want to create an entirely private blog but want to keep some posts and pages hidden? WordPress already has this ability built into the content editor. It's a simple to use feature that works like this:
Step 1: Go into any post or page you want to password protect.
Step 2: Find the "Publish" window within the editor. Most people will have this on the right-hand side.
Step 3: Locate the "Visibility" option within the publishing window. By default, it should read "Public."
Step 4: Click on "Edit" next to the visibility. This will provide you with radio buttons.

Step 5: Click the radio button for "Password protected." This will create a text field in which you can add a password.

Step 6: Create a password and click the "Ok" button below the text field.
Step 7: Your post or page is now set to password protection. This will take affect as soon as you click the "Update" or "Publish" button for the post or page.
This option only protects the content from public access. If an administrator or editor for your blog is already logged in, he or she can still see the content without the password requirement.
You can also select the post or page to be private in general. This means it will hide it from view from public access permanently. No passwords are available in this option, and it will restrict access to the content from outside visitors.
Other Plugins of Interest
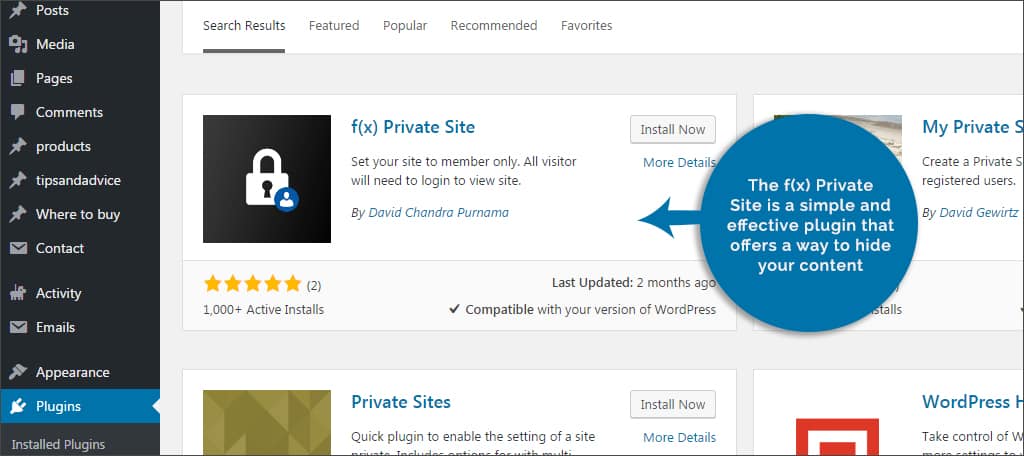
f(x) Private Site

The f(x) Private Site is a simple and effective plugin that offers a way to hide your content. Although it doesn't have some of the features of My Private Site, it is an easy system that does the job. One of its notable features is protecting the RSS feed.
Site Private

If you just want a simple redirect to keep unauthorized users from accessing content, Site Private is a quick and easy tool. This small installation sends visitors directly to the login page when they try to access other pages and posts.
WP Private Content Plus

If you want extensive control over restricting access to your site, the WP Private Content Plus plugin is quite elaborate. With this plugin, you're able to govern over user roles and specific access to content. You can also restrict widgets, search and menus to members.
Creating a private site has many uses. From keeping the content family-oriented to delivering a platform for employees, WordPress is a great solution for online communication and information sharing. All it takes is a bit of imagination and the right plugin.
How would you use a private WordPress blog? What kind of plugins do you use to provide safety and security of your information?
How To Set Up A Private Blog
Source: https://www.greengeeks.com/tutorials/how-to-set-wordpress-to-make-a-completely-private-blog/
Posted by: jonessuas1985.blogspot.com

0 Response to "How To Set Up A Private Blog"
Post a Comment